> ## Documentation Index
> Fetch the complete documentation index at: https://docs.origamiagents.com/llms.txt
> Use this file to discover all available pages before exploring further.
# Workflow Setup
> Configure your workflow to work as an API
To use a workflow as an API, you need to add two nodes to your workflow: an **Input node** and an **Output node**. These nodes define where data enters and exits your workflow.
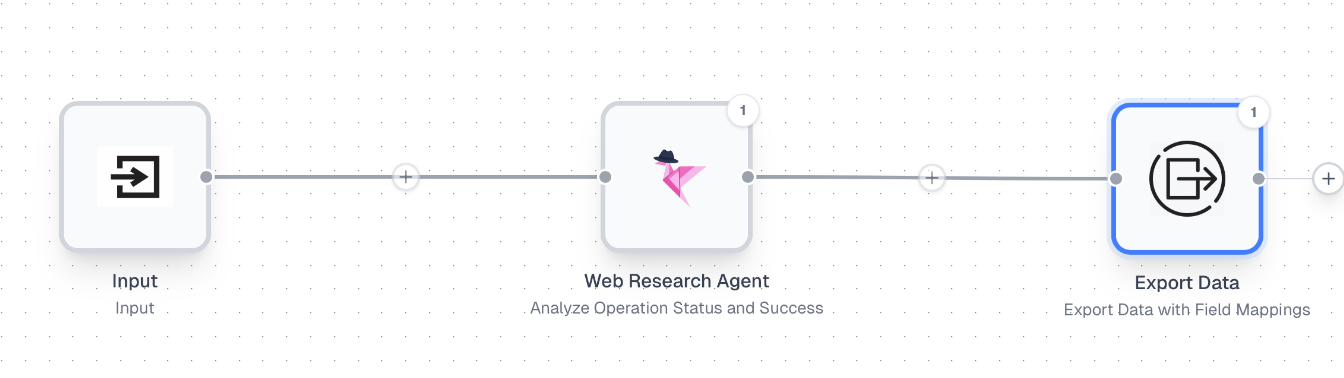 ## The Input Node
The Input node is where your API data enters the workflow. When you make an API request, the rows you send become the rows processed by your workflow.
### How it works
The Input node has two modes:
1. **Add Rows** - Manually add test data to simulate workflow runs during development
2. **From API Run** - When triggered via API, data comes from your API request instead
## The Input Node
The Input node is where your API data enters the workflow. When you make an API request, the rows you send become the rows processed by your workflow.
### How it works
The Input node has two modes:
1. **Add Rows** - Manually add test data to simulate workflow runs during development
2. **From API Run** - When triggered via API, data comes from your API request instead
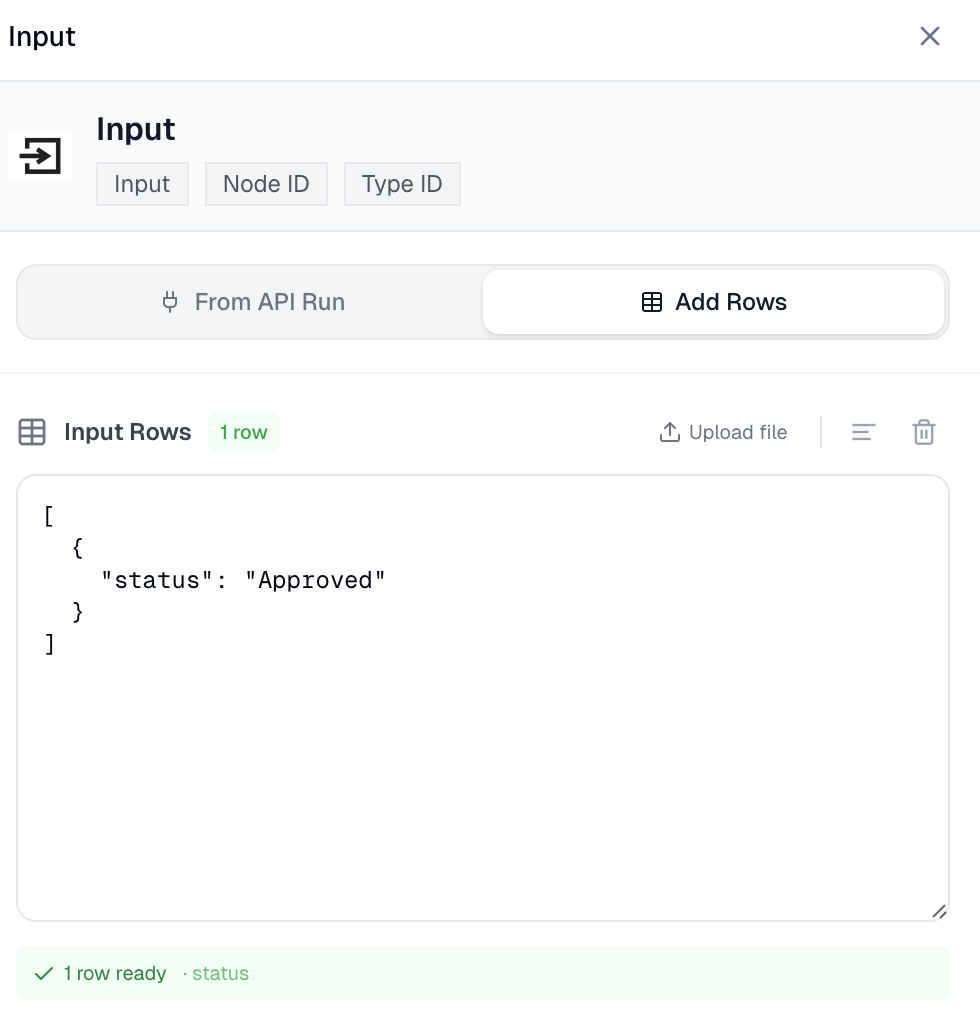 The test data you add in "Add Rows" mode is **only used for manual runs** in the Origami interface. When you trigger the workflow via API, your API request data completely replaces this test data.
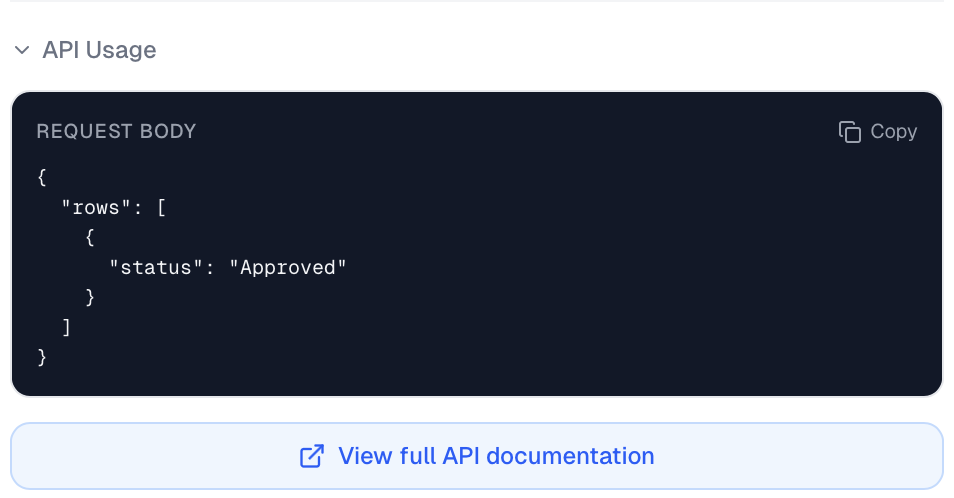
### Copy the sample request body
Once you've added test data, the Input node shows an **API Usage** section with a ready-to-use request body. Click **Copy** to grab the exact payload for your API request.
The test data you add in "Add Rows" mode is **only used for manual runs** in the Origami interface. When you trigger the workflow via API, your API request data completely replaces this test data.
### Copy the sample request body
Once you've added test data, the Input node shows an **API Usage** section with a ready-to-use request body. Click **Copy** to grab the exact payload for your API request.
 ## The Output Node
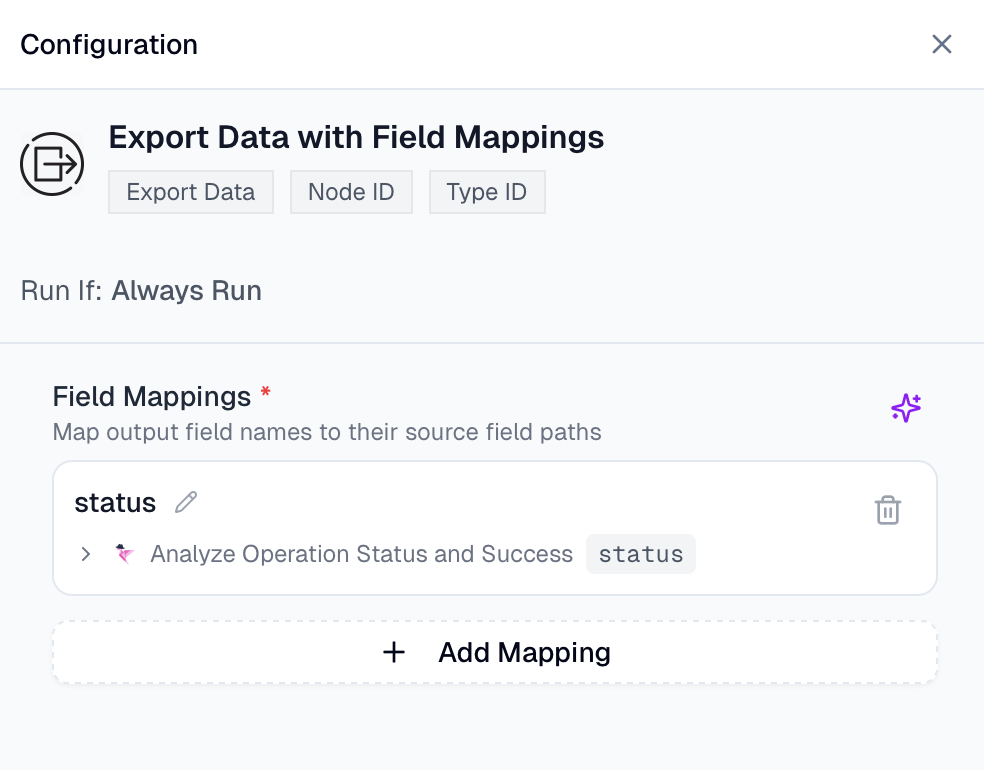
The Output node defines what data your API returns. You configure it using **field mappings** that specify exactly what gets included in your response.
## The Output Node
The Output node defines what data your API returns. You configure it using **field mappings** that specify exactly what gets included in your response.
 ### Field mappings
Each field mapping creates one key in your output JSON. You define:
1. **The output key** - The name of the field in your response
2. **The source path** - Where to pull the value from (a field from another node)
You can add as many field mappings as you need. Each one becomes a key in the output object.
### Output structure
When you fetch results from a completed run, the response contains a map of row IDs to their output objects:
```json theme={null}
{
"success": true,
"data": {
"": {
"": "",
"": ""
}
}
}
```
You can have multiple Output nodes in a workflow. The API response will include data from all of them, merged into each row's output object.
## Putting it all together
This receives the `rows` array from your API request
Process the data through whatever nodes you need
Configure field mappings to define what data gets returned
Add test rows to the Input node and run the workflow manually
Copy the sample request body and make your API call
## Next Steps
Make your first API call
Full API reference for triggering runs
### Field mappings
Each field mapping creates one key in your output JSON. You define:
1. **The output key** - The name of the field in your response
2. **The source path** - Where to pull the value from (a field from another node)
You can add as many field mappings as you need. Each one becomes a key in the output object.
### Output structure
When you fetch results from a completed run, the response contains a map of row IDs to their output objects:
```json theme={null}
{
"success": true,
"data": {
"": {
"": "",
"": ""
}
}
}
```
You can have multiple Output nodes in a workflow. The API response will include data from all of them, merged into each row's output object.
## Putting it all together
This receives the `rows` array from your API request
Process the data through whatever nodes you need
Configure field mappings to define what data gets returned
Add test rows to the Input node and run the workflow manually
Copy the sample request body and make your API call
## Next Steps
Make your first API call
Full API reference for triggering runs